Visual Materials
Big Creek Powerhouse #4

You might also be interested in

Big Creek Powerhouse #4
Visual Materials
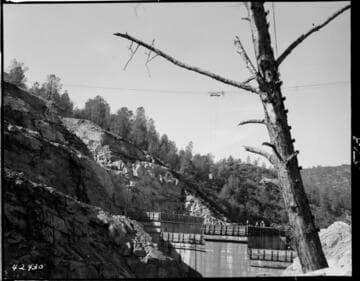
Big Creek Powerhouse #4 - Construction pictures taken by Dam & Tunnel Office. [Dam 7 viewed from overhead downstream showing start of spillway buckets]
photCL SCE 02 - 42436

Big Creek Powerhouse #4
Visual Materials
Big Creek Powerhouse #4 - Construction pictures taken by Dam & Tunnel Office. [Dam 7 progress - downstream view showing spillway]
photCL SCE 02 - 42456

Big Creek Powerhouse #4
Visual Materials
Big Creek Powerhouse #4 - Construction pictures taken by Dam & Tunnel Office. [Dam 7 progress with concrete buckets moving into position]
photCL SCE 02 - 42428

Big Creek Powerhouse #4
Visual Materials
Big Creek Powerhouse #4 - Construction pictures taken by Dam & Tunnel Office. [Dam 7 progress with concrete buckets moving into position]
photCL SCE 02 - 42429
Big Creek Powerhouse #4
Visual Materials
Big Creek Powerhouse #4 - Construction pictures taken by Dam & Tunnel Office. [Dam 7 progress with concrete buckets moving into position]
photCL SCE 02 - 42430

Big Creek Powerhouse #4
Visual Materials
Big Creek Powerhouse #4 - Construction pictures taken by Dam & Tunnel Office. [Dam 7 progress on concrete placement]
photCL SCE 02 - 42442