Visual Materials
Big Creek, Mono-Bear Diversion

You might also be interested in

Big Creek, Mono-Bear Diversion
Visual Materials
Big Creek, Mono-Bear Diversion - Showing duplex valve in Huntington-Pitman-Shaver Conduit just below Dam #2.
photCL SCE 02 - 14770

Big Creek, Mono-Bear Diversion
Visual Materials
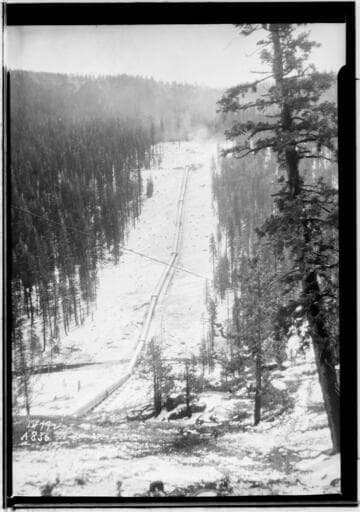
Big Creek, Mono-Bear Diversion - General view showing Mono flowline from point immediately below site of Mono Dam.
photCL SCE 02 - 14399

Big Creek, Mono-Bear Diversion
Visual Materials
Big Creek, Mono-Bear Diversion - Another view showing excavation for trench, north end of Mono Dam.
photCL SCE 02 - 14398

Big Creek, Mono-Bear Diversion
Visual Materials
Big Creek, Mono-Bear Diversion - Another view of Bear Creek Dam and reservoir, showing sluice pipes, gate mechanism, walkway, gauging house and top of intake structure.
photCL SCE 02 - 14755

Big Creek, Mono-Bear Diversion
Visual Materials
Big Creek, Mono-Bear Diversion - General view Mono flowline and dam site, with part of the flowline in place, looking upstream from 500' below dam. Damsite is just above [past] the derrick. (End of diversion flume shows under temporary bridge, lower left).
photCL SCE 02 - 14400
Big Creek, Mono-Bear Diversion
Visual Materials
Big Creek, Mono-Bear Diversion - Another view looking south at the Big Creek Siphon.
photCL SCE 02 - 14772