Opening Hours
Daily: 10 A.M.–5 P.M.
Closed on Tuesdays
1151 Oxford Road
San Marino, CA 91108
Visual Materials
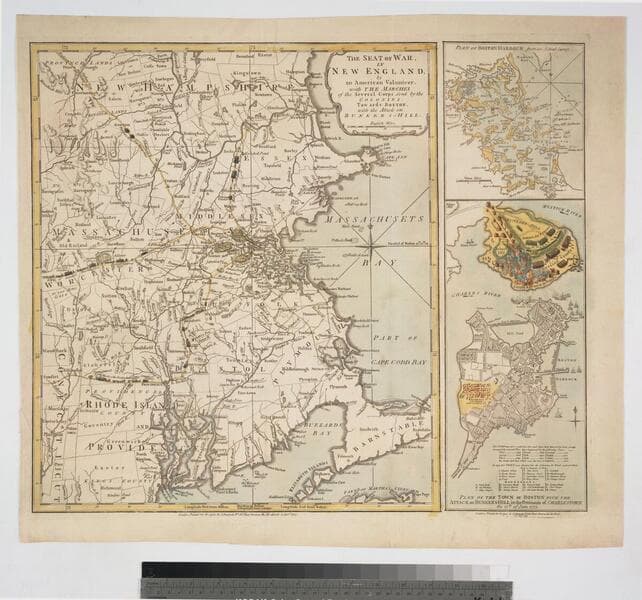
Daily: 10 A.M.–5 P.M.
Closed on Tuesdays
1151 Oxford Road
San Marino, CA 91108

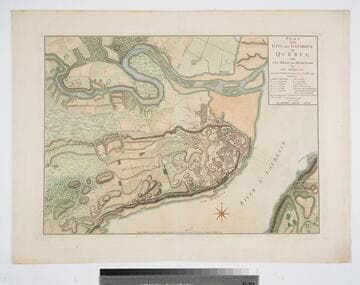
Visual Materials
Kashnor notes, "A very fine war plan, in colours, showing where Montgomery made his attack and the emplacement of batteries." A stunning map. Kershaw supplies appeared in information. Relief: hachures. Graphic Scale: Yards. Projection: Plane. Watermark: Crowned fluer-di-lis W F. Printing Process: Copper engraving. References: Kershaw 1041; LC Phillips 1207,1337.. Verso Text: MS note: 120.
093:120 M
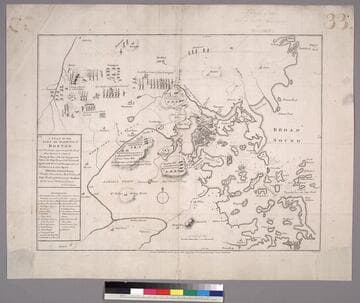
Visual Materials
Kashnor notes, "The earliest battle plan issued in London after the Battle of Bunker Hill, which took place the 17th June, 1775. Up to the present only one copy has been recorded, and it is of the greatest rarity. Below the title are 19 references which locate the Men-of-War in Boston Harbour, General Gage's camp on the Commons, etc. It shows the attack on Concord, and locates the 'Bridge where the attack began,' with groups of soldiers of both forces firing upon each other, and 'Provincials firing behind the walls.' " Provincials are also named as "Minutemen." Many fighting figures. MS notes: Plan of the Town and Harbour of Boston 33 (faded). Relief: hachures. Graphic Scale: Miles. Projection: Plane. Watermark: Fleur-di-lis over shield and GB. Printing Process: Copper engraving. Other Features: Figures . Verso Text: MS notes: Plan of the Town and Harbour of Boston 33.
093:578 M
Image not available
Visual Materials
No old shelf mark. An important map of the action by an eye witness. Probably published in London soon after the battle. View of Charlestown & from Beacon Hill, Boston. Plan of Redoubt & Co. on Bunker's Hill. from Gent. Mag. Relief: hachures. Graphic Scale: Yards. Projection: Plane. Printing Process: Copper engraving.
ephMPMASS0001
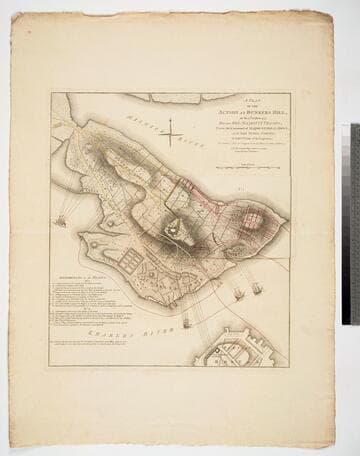
Visual Materials
Kashnor notes, "Of this map, no other complete copy can be traced. It was re-engraved for Stedman's History, but without the slip. The slip No. 1 is laid over that part of Bunker's Hill, which was in the hands of the colonists, and shows the first position of the English troops. The Colonial forces shown in yellow, the English in red. On lifting the slip there is shown the second position of the English forces, with the hill almost surrounded. In the Charles River the two warships Lively and Falcon are bombarding the hill, and off Charlestown Neck the armed transport is firing on the Colonial communications. A scale of reference is given, which relates to both the slip and the map. It is probable that this plan was never published, and only engraved for official use. There is no engraver or publisher, but a copy, evidently wanting the slip No. 1, is in the Library of Congress, where it is in the Faden Collection." Kashnor notes publication by [W. Faden, 1775]. Kashnor is incorrect on several points. Both Stedman's History and the later published Faden's Maps of the American War contain copies of this map, both with the flap or slip in place, or at least in the Huntington Library copies. Those copies do differ from this one. Each includes the words "To front Page 127, Vol. 1" above the neatline upper right corner. They are also marked below the title "Engraved for Stedman's History of the American War, Published by the Author, April 12, 1793." Slip or flap showing two positions of the English forces during the battle.. Relief: hachures. Graphic Scale: Yards. Projection: Plane. Watermark: Crowned fleur-di-lis WF. Printing Process: Copper engraving. Other Features: Sub-maps. Verso Text: M S note: 846.
093:846 M